
Key Takeaways
- The right repair method depends on hole size: spackling paste for nail pops and small holes under 1/2 inch, mesh tape and joint compound for holes up to 4 to 6 inches, and a drywall patch panel for anything larger.
- Joint compound requires three coats for a flat, invisible repair. Skipping coats is the single most common DIY mistake.
- Paper tape creates a stronger seam bond than mesh tape for large repairs. Mesh tape is faster but more prone to cracking along the seam over time.
- Sanding between coats, not just after the final coat, is what separates a visible patch from one that disappears under paint.
- In Monmouth County homes built before 1980, match the drywall thickness carefully. Many older homes used 3/8-inch drywall, not the 1/2-inch standard today.
- Texture matching is the hardest part of any drywall repair. Skip it on the first patch, and the repair will look worse than the hole.
Patching drywall is one of the easiest home repairs. A small hole takes 15 minutes of active work and a day of drying time. A large hole takes a few hours spread over two days. Here’s how to do it right.
Start Here: Match the Repair to the Hole
Not every drywall fix is the same job. Using the wrong technique wastes time and leaves a visible patch.
Nail pops and small holes under 1/2 inch: These come from picture hooks, screws, and doorknob strikes. Spackling paste handles them cleanly. Apply with a putty knife, let it dry, sand it flush, and touch up paint. Done.
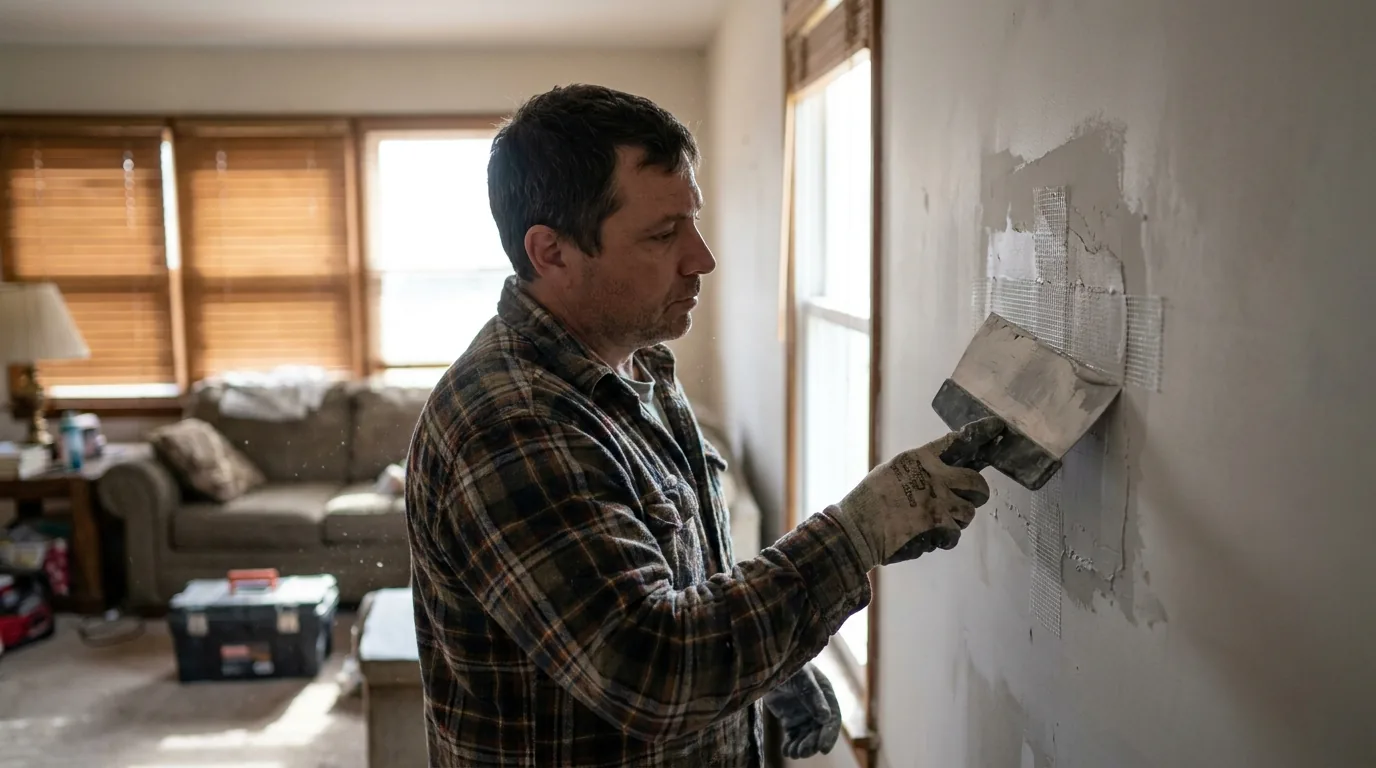
Holes from 1/2 inch to 4 inches: This is the most common range for doorknob holes, anchors that pulled through, and accidental impact. Drywall mesh tape and joint compound work well here. No panel cutting needed.
Holes larger than 4 to 6 inches: This size requires a proper patch panel cut from new drywall. The patch needs to be attached to solid backing so it doesn’t flex and crack the compound over it.
Knowing which category you’re in before you buy anything saves a trip to the store.
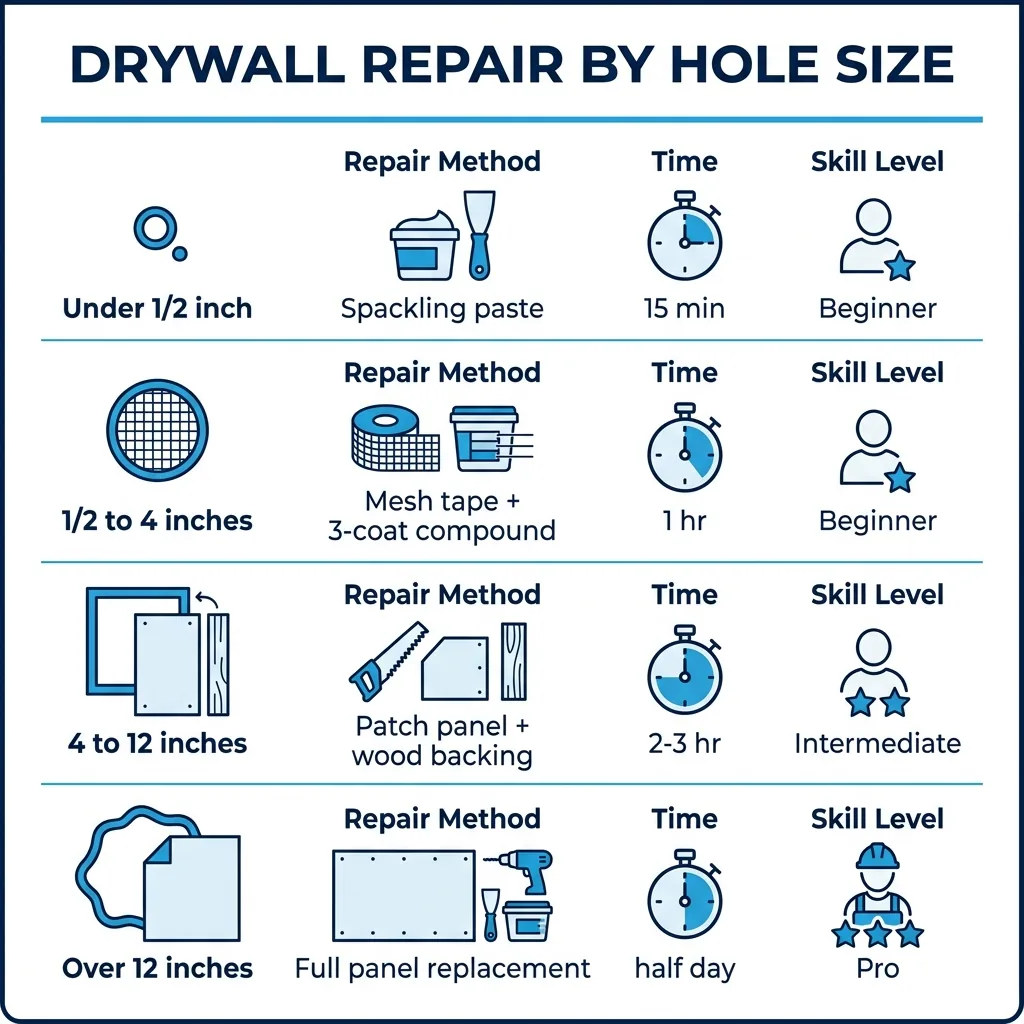
Repair Method by Hole Size: Quick Reference
Use this table to pick the right approach before buying anything.
| Hole Size | Repair Method | Time to Complete | Skill Level |
|---|---|---|---|
| Under 1/2 inch (nail, screw) | Spackling paste + putty knife | 15 min active, 2 hr dry | Beginner |
| 1/2 inch to 4 inches | Mesh tape + 3-coat joint compound | 1 hr active, 2 days dry | Beginner |
| 4 to 12 inches | Patch panel + wood backing + 3-coat compound | 2 to 3 hr active, 2 days dry | Intermediate |
| Over 12 inches | Full drywall panel replacement | Half day active, 2 days dry | Intermediate/Pro |
Tools and Materials You Actually Need
For small holes (under 1/2 inch):
- Spackling paste (lightweight formula dries faster)
- Putty knife (3 to 4 inches)
- Fine-grit sandpaper (120 to 150 grit)
- Matching paint
For medium holes (1/2 inch to 4 to 6 inches):
- Self-adhesive drywall mesh tape
- All-purpose joint compound (“mud”)
- 6-inch and 10-inch drywall knives
- Sanding sponge or 120-grit sandpaper
- Primer + matching paint
For large holes (over 4 to 6 inches):
- New drywall panel (match existing thickness, typically 1/2 inch)
- Drywall saw or utility knife
- Wood furring strips (1×3 or 2×4 scraps) for backing
- Drywall screws (1-1/4 inch)
- Screw gun or drill
- Mesh or paper tape
- Joint compound
- 6-inch, 10-inch, and 12-inch drywall knives
- Sanding sponge
- Primer + matching paint
The drywall knife width matters. A 6-inch knife applies the first coat. A 10-inch knife feathers the second. A 12-inch knife blends the third coat into the surrounding wall. Trying to do all three coats with the same 6-inch knife is how you end up with a visible hump.
Our***repair services in Oakhurst, NJ*** handle drywall patching as part of general home maintenance. If the damage is large or involves water, it’s worth a professional look before you patch over a problem that’s still wet.
Step-by-Step: Patching a Medium Hole
This method works for holes from about 1/2 inch to 4 to 6 inches. It’s the most common repair and the one most homeowners need.
Step 1: Prep the Hole
Remove any loose or crumbling drywall around the edges. A clean hole patches better than a ragged one. If the edges are soft or paper is lifting, tear it back to solid material. Sand the area lightly to knock down any high spots.
Step 2: Apply Mesh Tape
Cut a piece of self-adhesive mesh tape slightly larger than the hole. Center it over the opening and press firmly. The mesh holds the compound while it dries and prevents the patch from cracking if the wall flexes.
Step 3: First Coat of Joint Compound
Use your 6-inch knife to press joint compound into the mesh, working it into the weave. Apply enough to fill the hole and cover the tape. This coat doesn’t need to look perfect. It needs to fill. Feather the edges slightly so the second coat has something to blend into.
Let it dry completely. Drying time for joint compound is about 24 hours in normal humidity. In Monmouth County homes during summer, high humidity slows drying noticeably. Give it the full time. Applying the next coat over damp mud causes cracking.
Step 4: Second Coat
Switch to your 10-inch knife. Apply a thinner coat over the first, extending it 2 to 3 inches beyond the edges of the tape on all sides. The goal is to blend the patch into the surrounding wall. Sand lightly between coats with a fine-grit sponge.
According to Bob Vila’s drywall repair guide, a second coat should dry for about 8 hours before sanding and recoating.
Step 5: Third Coat
This is the finish coat. Use a 12-inch knife if you have one. Apply a very thin, smooth layer extending 4 to 6 inches from the original hole. This coat should be almost transparent when wet. It exists to eliminate the slight ridge left by the second coat. Sand it smooth after drying.
Step 6: Sand, Prime, Paint
Sand the entire repair with a fine-grit sponge or 120-grit paper until it’s completely flush with the wall. Run your hand across it. You shouldn’t feel the edge of the patch at all.
Prime before painting. Unpainted joint compound is porous and absorbs paint differently than the surrounding drywall. Without primer, the patch will show as a flat spot even if it’s perfectly smooth. One coat of primer, then match your paint.
Step-by-Step: Patching a Large Hole
For holes over 4 to 6 inches, mesh tape alone doesn’t provide enough structural support. You need a proper patch panel anchored to the wall.
Step 1: Cut a Clean Rectangle Around the Damage
Use a drywall saw or utility knife to cut a clean rectangular or square opening around the damaged area. Make your cuts straight and square. A ragged, irregular opening is harder to patch cleanly.
Step 2: Install Backing
Cut two pieces of wood furring strip (1×3 or 2×4 scraps work fine) and slide them into the opening so they extend at least 2 inches past the edge of the opening on each side. Secure them to the existing drywall with drywall screws. These become the substrate your patch screws into.
Step 3: Cut and Install the Patch
Measure the opening precisely. Cut your patch panel to fit from new drywall that matches the existing thickness. In most Monmouth County homes built after 1985, that’s 1/2 inch. Older homes often used 3/8 inch. Measure the existing wall at the opening to be sure.
Screw the patch panel to the backing strips with 1-1/4 inch drywall screws. Drive screws every 6 inches around the perimeter and one or two through the center. Countersink them just slightly so the screw head sits below the surface but doesn’t break through the paper.
Step 4: Tape All Seams
Apply paper tape or mesh tape to every seam where the patch meets the existing wall. Press it firmly into the joint. Paper tape creates a stronger bond on seams; experts at Nations Drywall recommend paper tape for repairs where structural stability matters.
Then follow the same three-coat compound process described above: fill coat, feather coat, finish coat.
The Texture Problem: Don’t Skip This Step
The compound work is the easy part to learn. Texture matching is harder.
Most walls in Oakhurst-area homes have some texture: orange peel, knockdown, or light skip trowel. A smooth patch in the middle of a textured wall looks worse than the original hole. It catches light differently and draws the eye directly to it.
For small patches, a light stipple with a damp sponge before the compound fully dries can approximate a simple texture. For larger areas, a spray can of orange peel texture is available at most home improvement stores and matches basic textures reasonably well.
For knockdown or custom textures, matching requires practice. This is the one part of drywall repair where hiring a professional gets you better results faster than learning it yourself. Our handyman repair service handles texture matching on patches of all sizes.
Read our related guides on what are the most common electrical problems in homes and why you should winterize your home with handyman services in NJ for more home maintenance guidance.
When the Patch Is Not the Right Fix
Drywall patching fixes cosmetic damage. It does not fix the cause of the damage.
A hole from a door swinging open needs a door stop, not just a patch. Without the stop, the knob will punch through the wall again.
Water stains require fixing the source of moisture before patching. Patching over active or recurring moisture leads to mold. The drywall needs to be fully dry, typically 72 hours after the water source is fixed, before any repair compound goes on.
Large areas of crumbling drywall in a bathroom or basement context may indicate ongoing humidity problems. In shore-area homes near Oakhurst and Long Branch, high ambient humidity in summer accelerates drywall degradation in poorly ventilated spaces. Address the ventilation before worrying about the cosmetics.
For large-area repairs, professional drywall contractors typically charge $200 to $550 for multiple holes and cracks in a single room. That range helps you decide whether a DIY repair makes sense or whether hiring a pro saves time and produces a better result. If the damage covers more than a few square feet, or if the backer board behind tile has failed, the repair scope grows quickly. We handle larger drywall replacements through our home repair handyman service.
Frequently Asked Questions
1. Is it better to use mesh tape or paper tape for drywall repairs?
Mesh tape is easier to apply and works well for small to medium holes. Paper tape creates a stronger bond and is less prone to cracking along seams under stress. For large repairs or areas that experience movement, paper tape is the better choice. Many professionals use paper tape for all repairs, reserving mesh for quick, small fixes.
2. How big of a hole can you patch with joint compound and tape alone?
Mesh tape and joint compound reliably cover holes up to about 4 to 6 inches without a backing panel. Beyond that, the patch lacks structural support and will flex and crack. A proper patch panel anchored to wood backing is required for larger openings.
3. What are the most common mistakes when patching drywall?
The most common mistakes are: applying only one or two coats of compound instead of three, failing to sand between coats, not priming before painting, and skipping texture matching. Any one of these leaves a visible repair. Together, they guarantee that the patch will show under any lighting angle.
4. How long does drywall compound take to dry before sanding?
All-purpose joint compound typically dries in 24 hours in normal conditions. In humid NJ summers, add 4 to 8 hours. Quick-set compound dries faster (20 to 90 minutes, depending on the formula) but is harder to sand smoothly and is better suited for filling large voids than finish coats.